Welcome to my blog. Let what you see stimulate your imagination and inspire your own creations.

Monday, December 26, 2011

A tale of two boxes


I finally finished the project I was working on. I've deliberately hidden the lid, to preserve the surprise when it's published in SSW&C. However, I did take pictures to show you how much better the second box fit the lid than the first. (The first is the top picture.)

Retrofitting the box to the lid, which already had a liner in place, was time-consuming. I cut the inside of the box smaller than it needed to be so I could sand it to exact fit. I also cut the box oversized, so I could trace the perimeter of the lid for a good match. Since the lid came out well, I did not want to disturb it.

The result was a nicely matched box and lid, with a liner so precisely fitted that there is no movement at all with the lid in place. I'm glad I did it, but I'm also glad it's done!

Thursday, December 22, 2011

When is "good enough" good enough?

I'm about to spend the afternoon remaking the base for a box that will be appearing at some point in Scroll Saw Woodworking & Crafts magazine.

The lid, which was the tricky part, came out fine. The base, however, which should have been a snap, did not match the lid as well as it could have, had a weird curve at the bottom, and gave me a hard time finishing. It did not look awful, and could have been sold or given as a gift as it was.

I had hoped to be done with the project by now, but the thought of a published photo of a box that didn't look right made it a no-brainer to remake the offending part.

By contrast, when one side of an elaborate box for the new book did not glue up as invisibly as I would have expected, I just marked that side with tape, with instructions to photograph only the unmarked sides. There was so much work that went into that box that I did not have the heart to redo it, and the photography for the book turned out fine.

I'll post pictures of the original and corrected base so you can see why I made my choice. If you've ever let something go, and found that it bothered you long after, you'll understand why I made my decision.

Tuesday, December 13, 2011

If you don't hear back, try again

I find that occasionally a perfectly valid email gets sent to my spam folder. Although I try to sort through the spam before deleting, if you've sent me an email and don't hear back within a day or so, please re-send your message. I try to respond the same day, barring problems with my internet provider, so if you don't get a response, your email may have been accidentally deleted.

Sunday, December 11, 2011

Drill press alignment


Although I always check the alignment of my scroll saw, spindle sander, and vertical belt sander, it never occurred to me to check out the drill press. Since I never had any problems, the last time I checked for square was when we assembled the tool, about a year and a half ago. It was fine right out of the box.

The other day I needed to drill a deep 1/8" hole for the brass pivot rod of a box whose sides were 5/16" wide. A serious misalignment of the bit could result in its coming through the wall of the box, or at the very least, the pivot rod going in crooked. I chucked the bit into the drill press, and turned it on to see if it was inserted properly. Something didn't look right.

I re-chucked it, turned on the tool, and it still didn't look right. So I put my most accurate square (a 6" Starrett combination square, worth every dollar of its outrageous price) next to the blade, and was it ever off! When I checked the square against a larger bit, the discrepancy was even more pronounced. So, I took out the hex wrench that came with the tool (don't ask how I even remembered where I had stored it), found that the bolt had loosened up over time, and readjusted the table to level in the side-to-side position.

I've taken to aligning my tools by using my eye and the combination square, and find that it's quick and amazingly accurate. The picture shows my setup, as well as the monster wrench that was used for the adjustment. I also checked the front to back alignment, and found that it was still fine.

And yes, had I not checked, I would have ruined a box in which I had invested a lot of time, as well as some newly resawn exotic wood.

Sunday, December 4, 2011

Interesting review on Amazon

I regularly check the bowl book reviews on Amazon to see what folks have to say, and to get ideas for ways to improve my work.

Yesterday, a review was posted, written by someone new to scrolling, who had the courage to start out with a bowl. Although his adventure wasn't without some difficulties, his excitement reminded me of when I cut my first bowl, and was totally amazed when this flat piece of wood turned into a three dimensional object. He had yet to sand it, but sounded really pleased with the cutting. I was glad he found the instructions clear and easy to follow.

I wouldn't generally think of a bowl as a starter project, but apparently it works out pretty well, and is a good way to get someone seriously hooked on the scroll saw.

Tuesday, November 29, 2011

Fast and easy finishing method

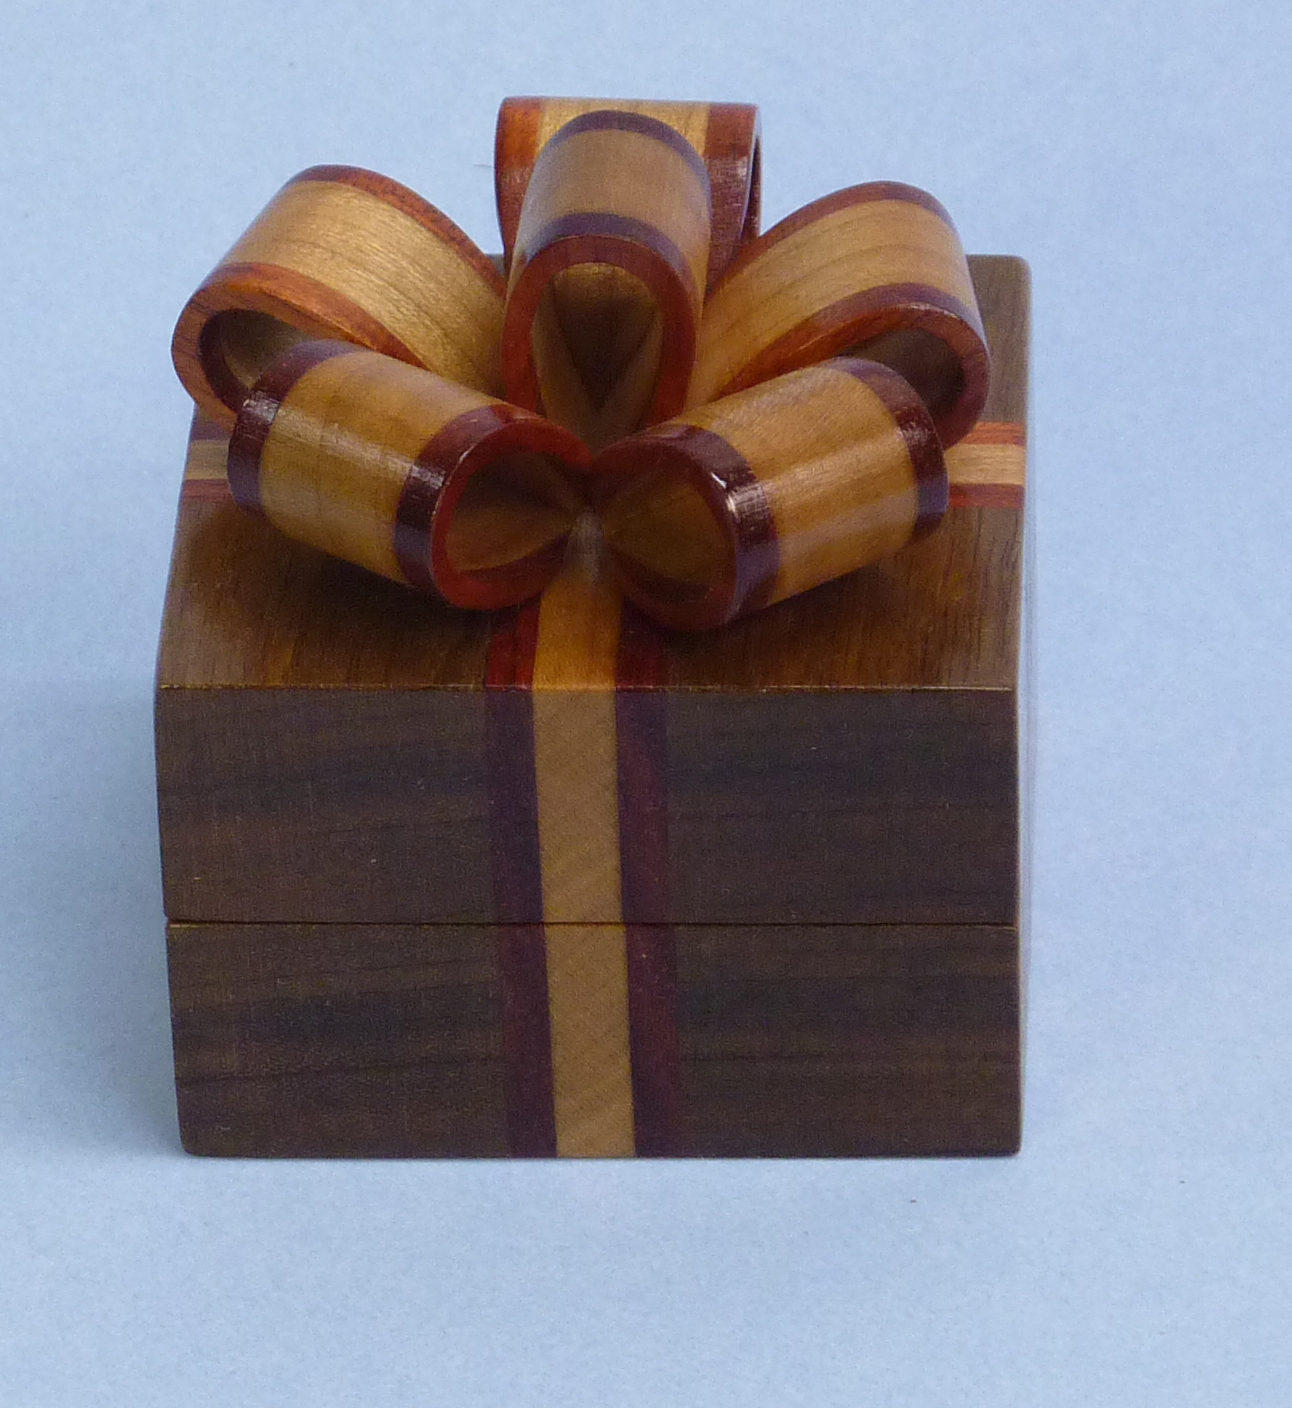
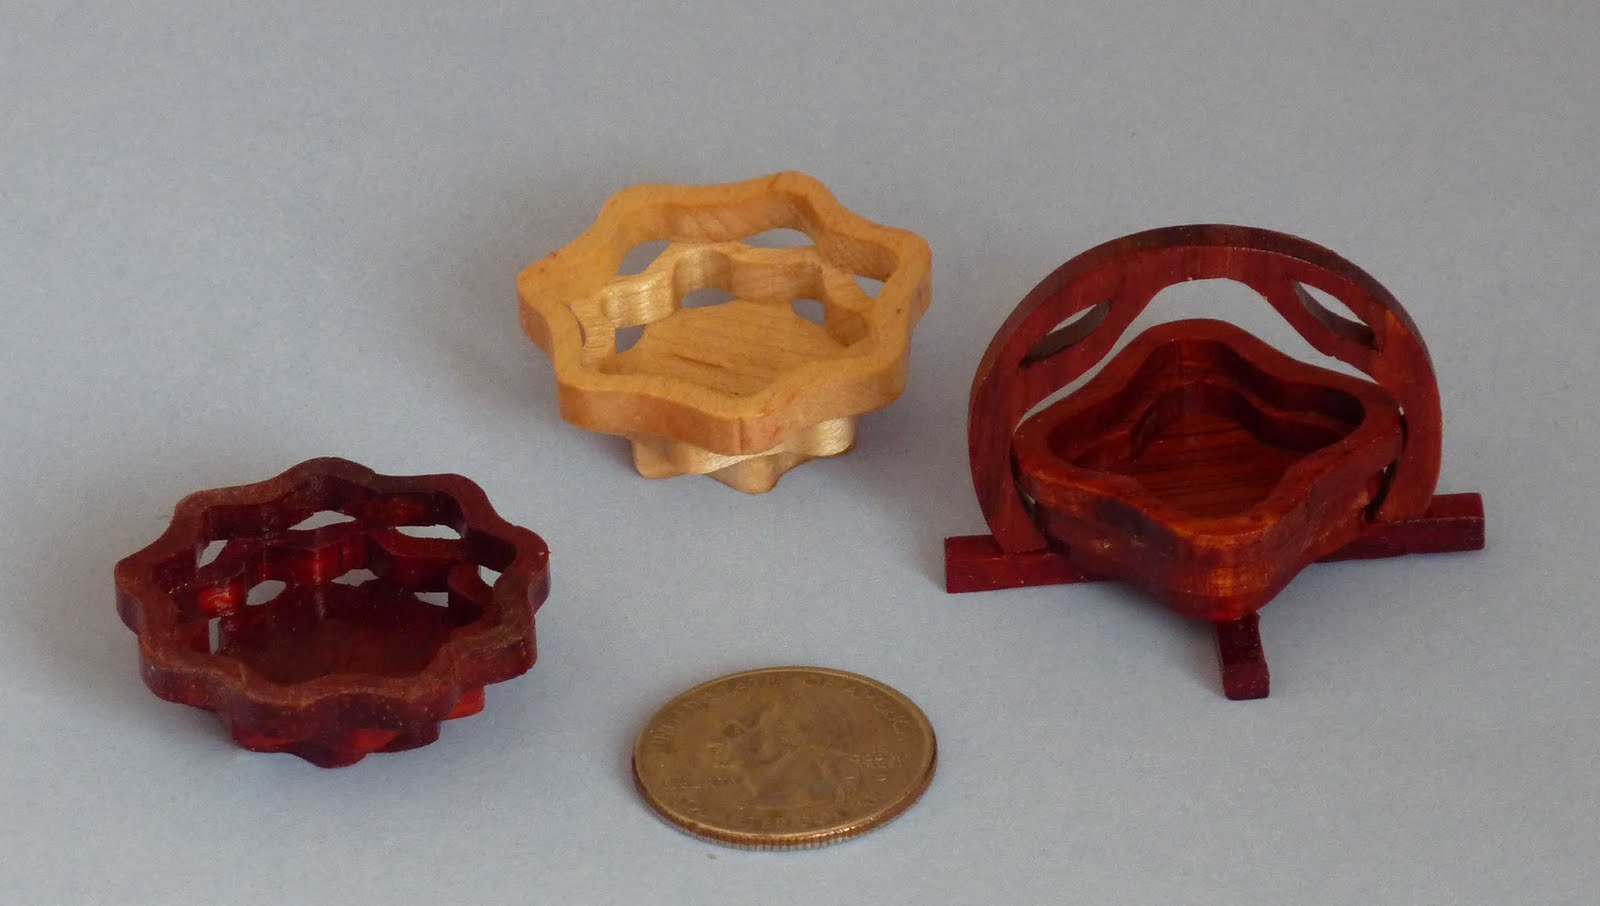
Since my garage shop has no ventilation, it's not the place to apply the clear coat finishes I like to use on my projects. Fortunately, the activities building that's part of my condo development has an art room, with a fan that vents to the outside. The down side of this is that I have to use the room when no one else is around, close the door, put on the fan, and get to work.

So, for me, speed is important, and over the past few years, I've streamlined my approach. First, if glue spots may be an issue, it's prudent to apply mineral spirits to the project right after I think I've finished sanding it. This makes any glue spots clearly visible. If you use some chalk to mark them, you'll be able to find them again once the mineral spirits dry. I sand off all I find, using the finest grit that does the job. If they're stubborn and I need a coarse paper to remove all traces, I sand through the grits in that area so it will finish the same as the rest of the project.

Then, I cover the table with newspaper and place the pieces to be finished on small pieces of wood. I apply a thin coat of spray shellac. This seals the wood, and reveals any glue spots I may have missed. I rub down the finish, which tends to be a little rough at this stage, using either 320 grit sandpaper, 0000 steel wool, or a sanding mop at 320 grit.

I tack everything off well (damp paper towel works for me if I'm careful) and apply several coats of clear gloss spray lacquer. This dries very quickly, and between each coat, I check for sags or roughness, and rub them down with the 0000 steel wool. When I've coated the projects to my satisfaction, I give them an overnight dry, then a final rubdown with 0000 steel wool for a soft matte finish.

Since the building is climate controlled, humidity and temperature is not a factor, and I can often complete the entire job within 2 hours or so. Then, I clean up my materials, turn off the fan, and no one even knows I was there!

Monday, November 21, 2011

The long wait should soon be over


The new box book is not yet generally available, but I just got my advance copy. That convinced me beyond a doubt that it's really going to happen! The picture above is of one of the projects, a little ring box, made using little brass barrel hinges and containing a velvet-covered insert for a small ring. It took a while to figure out how to make a professional-looking insert that was inexpensive and easy, but I finally nailed it. This project is one of several small jewelry boxes that are quite professional looking, and should make great gifts or crafts fair items.

The new book is about 40 pages longer than the bowl book, although it contains the same number of projects. Since many of the projects were different from each other, a lot more photos were needed for clarity of instruction. I'm really excited about sharing my projects, and glad that the book is almost here.

Monday, November 14, 2011

Today's photoshoot

Wish I had pictures to show you from today's photoshoot with the photographer from Woodworker's Journal. I was really pleased to have a new box project accepted by them for publication, and they sent a pro to my shop for the process shots. The first time this happened, it was quite an adjustment, since I've been used to taking my own process shots for my books and articles.

Well, my shots are certainly functional, but these were elegant! We worked from 9AM to 6PM, at which time I was barely standing. When I get the proofs back, I'll make my selection, integrate them into the text, and wait while the WWJ editors turn the whole thing into an article.

It's really amazing to watch your garage workshop become a full-fledged photo studio, and I feel really fortunate to have this happen twice (so far). I'll let you know when the article comes out--it's a really nice project, and quite different from anything in the book.

Saturday, November 5, 2011

The inspiration for the box


Thought you might like to see the image that inspired the box. It took some work to make it into a pattern, but that's what Photoshop is for!

Thursday, October 27, 2011

New project


I was looking for an interesting design for a pivot-lid box, and adapted the pattern from a Vietnamese temple window. The box also gave me an excuse to use my new assortment of rare earth magnets, which are amazingly powerful. To avoid cutting the tiny decorative circles, I used slices of 1/4" walnut dowel.

The new box book has a chapter on making boxes with pivot lids. The ones in the book use a slightly different construction that does not involve magnets, but the basic principles are the same. I would avoid magnets on boxes for children, because of the potential swallowing hazard if one ever came loose (unlikely, but possible).

These boxes are easy to make, and easy to customize or vary, and I think should be good crafts fair sellers.

Monday, October 24, 2011

New experiments


In a search for a way to dress up my "cakes", I took advantage of the knowledge base of folks on the scroll saw forum, and decided to play around with fabric paint (thanks, Kim!). I tried using the squeeze container itself, then found I had better control with a small bag made from parchment.

This is not baking parchment, which is treated with silicon to be non-stick. It's the parchment used to make disposable cake decorating bags, and is created from a triangle of whatever size you want. Instead of a metal tip, you just snip the end, which allows you to use every bit of the icing (or paint!), then you throw it away when you're finished. As you can see, I was able to get small dots, which look great when piped all over a cake, as well as a beaded border. The paint dries firm, and looks as though it won't fall off with handling.

I am also experimenting with flocking, and found that liquid fusion glue (a non-foaming urethane glue) worked well to adhere it to the wood. Last on my list is using stencils. I bought some small punches of various shapes, and found that by backing both blue tape and green (frog) tape with wax paper, I was able to punch out shapes. I'm planning to punch out a strip of shapes, like hearts, remove the wax paper, attach it to the "cake" and use acrylic paint to stencil the design.

As soon as I have something completed that actually uses some of these techniques, I'll post it. And if you decide to "play", please send photos of your results!

Sunday, October 16, 2011

Clarification

Just in case I created confusion, the book proposal that Fox Chapel declined was for Jewish-themed projects, like the menorahs I've been working on. The box book is a done deal, and right on target for release as planned. Sorry if I wasn't clear.

Wednesday, October 12, 2011

Some new ideas


After the projects for the box book were completed, I decided to "mix and match" techniques from different projects. Using the technique from my Pineapple Upside Down Cake Box, adding bows from my bow boxes, and a pedestal from the stand for the cupcake boxes, I came up with a two-layer cake decorated with bows. Each layer forms a separate box

I figured that once the book was out, and people could access the basic information, it would be fun to show how the different parts could be combined. This particular version was for a "chocolate" cake, mostly because I had some walnut on hand, but aspen or maple would work, too. And I kept the loops and tails simple on this, but the book shows how to make multicolored ribbons, which could be used as well.

When I first started learning how to use the scroll saw, one of the books I found helpful was Diana Thompson's box book. And in her book she stressed that by using the same techniques, but with variations, you'd never run out of projects to make. Good advice, and I intend to keep that tradition going when my own box book becomes available.

Monday, October 10, 2011

Disappointing News from Fox Chapel Publishers


I received a formal turn-down this morning from Fox Chapel, the publishers of my bowl and box books, and Scroll Saw Woodworking & Crafts magazine. Of course I am disappointed, but they are the ones to decide whether it's financially feasible for them, and they felt there was not sufficient interest to proceed.

I had almost all the projects prepared, and am now going to have to give some thought to where to go from here--whether to try marketing the items themselves, seek a different publisher, self-publish an ebook, or sell the patterns individually. Any ideas you might have are very welcome.

Here are the menorahs I proposed for the book. Thought you might like to see what might have been.

Tuesday, October 4, 2011

Anyone having trouble posting comments?

I've noticed that no one has been posting comments for some time. I just assumed that no one had anything much to say in response to the posts. However, I just heard from someone who was not able to post a comment, and I was wondering if that's happened to others.

So, if you've been unable to post a comment, please email me at my blog email address, scrollsawbowls@yahoo.com. If more than one person has had a problem, I'll see what I can do to get it corrected. I enjoy reading your comments, and kind of miss seeing them.

Thanks.

Saturday, October 1, 2011

Issues with the DeWalt 788

In 2006, I was asked to research scroll saws to determine which one should be purchased for the community woodshop where I live. There was no contest--the DeWalt 788 was hands-down the choice for a mid-priced saw.

Now, five years later, things have apparently changed. The scroll saw forum, sponsored by Fox Chapel, is full of reports of poor quality control, and really awful customer service. While some scrollers have had their saws for many years, others are finding problems right out of the box.

Just as troubling are the reports of technicians in factory authorized service centers have little knowledge of the tool, making incorrect or hasty diagnoses of problems, and holding the saws for weeks or months.

In response to this situation, letters are going out to Black & Decker, of which DeWalt is now a part, making these concerns explicit. When many people have the same types of problems, it's clear that something has changed. The letters may not make a difference, but you never know!


Friday, September 23, 2011

Thinking in terms of techniques, not categories

In case you're puzzled by the title of this post, here's what it means. A lot of scroll saw projects are viewed as categories of projects--intarsia, puzzles, inlay, and so forth. Although there's nothing wrong with projects that fit neatly into these categories, I find it much more exciting when they can be used as elements of a larger project.

For example, intarsia can be used to make a different and exciting lid for a box, as can inlay. The hamsa box in a previous post is an illustration of the use of inlay for a box cover. I've just created a bread board that looks like a braided challah, whose pieces were cut with attention to the grain, as you would do with intarsia, even though the edges were only rounded, not deeply shaped. Several of the box projects in my new book use stacked rings as a technique to create lips for lids, thus avoiding the need for a router.

As I continue to develop new projects, I'm finding that the more techniques I am familiar with, the more options I have available to me. Best of all, the projects defy categorization, and present themselves primarily as attractive projects that make people ask "how did you do that?"

Wednesday, September 14, 2011

Powerful little magnets

Some time ago, I picked up a few 1/4" diameter magnets at Michael's to use as closures for boxes. I finally got around to trying them out on a box with a pivoting lid, and they work really well. I just drilled a hole 1/8" deep for each magnet and glued them into place using a new (to me) glue, Liquid Fusion. It's a clear, non-foaming urethane glue that's supposed to work with metal, and I wanted an easier alternative to epoxy.

So far, so good--the glue was easy to apply and seems to hold well. The magnets are so powerful they hold even without actually touching each other, although I would not use them with objects meant for small children, in the event they come loose. The only thing to be careful about is to put the magnets in correctly, or they will repel instead of attract!

Monday, September 5, 2011

Back in action, finally!


Well, whatever it was that had me laid low decided to leave, and I was able to get in a full hour and a half sanding, finally, without breaking a sweat.

Thought I'd post some of my prototype Judaica projects, two "hamsa boxes". I tried two different styles, using inlay and InLace, and think I'll combine the two so I have an inlaid box lid with Inlace instead of wood for parts of the eye. This was my first serious inlay attempt, and I did pretty well at hiding the entry holes, using advice given by inlay "guru" Jim Collins, who does some incredible scroll saw inlay.

Still have several other projects up my sleeve, and am trying to incorporate different techniques into them, or create different versions. It's fun to get back to creating new stuff!

Thursday, September 1, 2011

Bummer!

So just as our power was restored, I came down with some sort of a bug that has had me out of commission again. I have this neat puzzle box on my work table, just waiting to be sanded, and a new menorah design in the works. Oh well, at least I have a hot shower! (And of course we're a lot better off than many folks.)

Tuesday, August 30, 2011

Back on line

Well, we survived Irene pretty well, but power was out until late this afternoon. That meant no scrolling or posting, reading by flashlight, and having some pretty strange meals.

Hope you all out there had little damage to contend with, and are getting back to normal.

Sunday, August 21, 2011

The end is in sight!


I was given a week to go over the page proofs, before the book ships to China. Amazing how many mistakes there are, even after many sets of eyes have looked it over.

So, instead of making sawdust, I'm measuring patterns and trying to make things just as clear as I possibly can. I was able to get in a two-part difficulty rating system for each project, from one to three little saw blades for cutting difficulty, and one to three little sanding discs for sanding difficulty.

The first chapter is laid out as a Q&A, and looks really good. I think this approach will make it easier to get to the heart of what you need to know. And repetitive stuff, like making loops and tails, flocking interiors, and inserting barrel hinges, are put into sidebars for cross-reference.

And just to give you some idea of the variety of projects, here's one of my favorites, a double-sized ring box, made using tiny barrel hinges, and complete with velvet-covered insert. So it's not just stacked rings anymore . . .


Saturday, August 13, 2011

The last project to make it into the book


This project was not among the original group of boxes for the book. However, since there was such a time lag between the submission of the materials and the beginning of the editing process, I had time to work on some new projects.

The chapter on boxes that look like miniature furniture capitalizes on the band saw box method of construction. I took one of the projects (a cute little chest of drawers) to a logical next stage, and added a hutch on top. The hutch needed some decoration, so I added some photos and little objects. The result was so cute I just had to include it in the book. What I like best about this type of project is that it can easily be personalized with scans of meaningful pictures, book covers, invitations, etc., just like I used to do with my cakes. I used pictures of my parents' wedding, and of my sons, as well as scans of some scroll saw magazine covers. The possibilities are endless.

The book contains patterns and instructions for making the little objects, as well as for the china cabinet itself. I flocked the drawer interiors since they are difficult to sand well, and purchased small brass knobs that screw directly into the drawers. The project requires some care and attention to detail, but is not at all difficult, and should make a great commission piece or very special gift.

Saturday, August 6, 2011

Finally, the secret is revealed


About a year ago, August 2nd to be exact, I posted a picture of a round yellow object with a red center, and challenged everyone to guess what it was. Well, now that the book cover has gone public and I've been cleared to reveal contents (but not methods or patterns), I can reveal what that mysterious object was: a pineapple slice, with cherry, for my pineapple upside-down cake box. That project is one of many in my "fun with food" chapter, along with cupcakes and my cinnamon-topped apple tart, using slices of real cinnamon. You can see them all in my new "author's photo" which will appear at the beginning of the book. Sort of fitting for a cake-decorator-turned-woodworker, wouldn't you think?

Tuesday, August 2, 2011

The Box Book has reached Amazon


It still won't be available until about February 2012, but at least it's officially on the board. I just found out that the book is now listed on Amazon, so I can finally show the cover, and even some projects.

The book is still in the final stages of editing, where you try to catch errors and make sure that everything is as good as you can make it. No matter how many people look at the manuscript, and no matter how many times you go over it, you never catch everything. However, all I can give it is my best shot, and I think this will be a book you can have a lot of fun with.

I mean, with a box that looks like a cupcake with sprinkles, how can you go wrong?


Sunday, July 31, 2011

Ever hear of bronze wool?

I thought the only "wool" around was steel wool, but there are other metals and combinations that are out there. One is even specially formulated to pack small spaces to keep mice out!

Someone suggested that bronze wool might be worth looking into, so I did some research, bought some pads, and am waiting for an opportunity to use it. Although it does not come finer than a "fine" grade, it should be good for smoothing intermediate coats. The advantage, apparently is that it does not shred or rust, like steel wool. It's especially recommended for marine use, which makes sense.

I also found out that there is some oil in most regular steel wool, that is added to prevent rusting. One manufacturer specializes in "oil free" steel wool, since oily residues can interfere with some finishes. I had been storing steel wool pads with assorted bits of sandpaper, and wondered where the oily looking patches were coming from. Never occurred to me that the steel wool might be the culprit.

I may just give the oil free stuff a try, since it, too, is not supposed to shred. If you've ever tried to tack off those little steel fibers, you know that it's not fun. Finishing is enough of a chore as it is. Anything that makes it better and easier is certainly worth a shot!


Thursday, July 21, 2011

Looking for inspiration

As I wait for the page proofs for the box book (promised by August) I'm thinking about some new paths to explore. Since the response to the menorah (project as well as pattern and instructions) has been so enthusiastic, I thought I might look into some other projects with a Judaica theme.

I have a couple of ideas to explore, but if anyone has any thoughts about something they would like to be able to make, please let me know, either by email, or by response to this post, and I'll see if it's something I can try.

A bit early for the holidays, but never too soon to think of neat stuff to make.

Wednesday, July 13, 2011

An early holiday project: A pivot arm menorah


I came across an interesting design for a menorah while browsing in a Judaica store. It is based on the arms pivoting around a rod that goes through the ends of the arms. I did some online research, and found that concept described as a traditional mid-Western design. I also found instructions for a candelabra using that mechanism, but with the arms facing down, as well as various posts on woodworking forums from people who had experimented with the concept over the years.

I found the design in the store attractive but knew it could be made far more interesting. I changed the shape of the arms to resemble Hebrew letters, and used a much smaller and thicker base, with an interesting shape. A touch of contrasting wood was used for color and added interest.

Here are some pictures of the menorah, which was made for a friend who loved my prototype. It can be positioned in a variety of ways because of the way it is made. If anyone is interested in making one, just use the email address on this blog, and I'll send you a pattern and set of instructions.

Sunday, July 10, 2011

A better foam brush

When I applied the last coat of Waterlox to my bowl, I used a cheap foam brush whose plastic support snapped almost immediately. This forced me to hold the brush by the foam itself, and made it impossible to remove excess oil from the foam. As you know, I did manage to get a good coat on, but it was a struggle.

Yesterday, while browsing in a waterfront hardware store, in search of bronze wool (more about that in a future post) I found a much better quality, made in the USA, foam brush. The foam was longer and denser than on the cheaper brush, and the head flexed without snapping. Being a big spender, I popped for 4, at 25 cents each. I did some online research, and found that it is readily available on many sites, including eBay.

The manufacturer is JEN, it's called a poly-brush, and it comes in the standard widths. If you like using the disposable foam brushes and have not been satisfied with "big box store" quality, you should be happy with these.

Wednesday, July 6, 2011

Triumph over Waterlox


Refusing to give up, I gave the bowl a final coat of Waterlox. This time, I wiped the bowl down thoroughly with mineral spirits until no specks at all were visible, strained the Waterlox to get rid of any steel wool particles I had inadvertently introduced, and used a disposable foam brush. I worked on the inside first, going over the sections until no dry spots were visible, and mopping up excess liquid from around the circumference of the base.

Then, I elevated the bowl on a small piece of wood, and worked on the outside. I left it overnight at the community shop, which is air conditioned, and picked it up the next morning. In a few weeks, when the finish has fully cured, I will give it a final rubdown.

I'm pleased with the way it came out, but the first time using any new product is always a bit hair-raising.

Sunday, July 3, 2011

Swag bowl tutorial

I'm nearly finished with a fairly complex swag bowl--just needs one more coat of finish. Rather than post just the completed project, I decided to post pictures of its earlier stages as well, so you can see how rough the bowl looked before sanding and finishing.

The pattern for the blank was based loosely on one used for a really high-end lathe-turned bowl. The glue-up was sanded with a drum sander, then finished on the SandFlee to get it really smooth and even. The main wood was ipé, the strips padauk, and the end pieces yellowheart.


The blank was then cut into four rings, at a 20˚ angle. The base was re-cut to a 35˚ angle for ease in shaping. The rings are stacked to illustrate how they look assembled, but are actually glued up one at a time.


To stack the rings so that the swags will line up properly, you must anticipate how they will meet once sanded.


Once the rings are glued together, the inside is sanded smooth, and the base is glued on.


Then, the outside is shaped and sanded, and the upper rim is given its final shaping.


I then applied several coats of Waterlox to finish the bowl. I usually use a combination of spray shellac and lacquer, which works quickly and easily, but decided to give this a try. Although the wood does look nice, I have conflicting sets of instructions on the best way to apply it, and will need more experience before I make a final decision about it. I still have one final coat to give it before letting it cure and giving it a nice rub out.


Friday, June 24, 2011

Another good resource

If your work requires use of leather, you're probably aware of its high cost. After suffering from sticker shock at prices from woodworking sites and local upholsterers, we turned to eBay. There we found a well-rated seller, Kyson's leather, and bought an entire cowhide, large enough for four desktops, for less than the cost of leather for a single desktop from other sources.

Our piece, unfortunately, had a slash in a bad location, but the seller took the whole hide back, and replaced it, without our having to pay any additional charges. They now sell from their own website, as well as on eBay, and are well worth looking into, if you use leather for any of the work you do.

Saturday, June 18, 2011

A very special supply source

Many years ago, there was a store called Constantine's, located in the Bronx. I was fascinated by their catalogue, which contained all sorts of exotic woods and veneers, and well as beautiful pre-made marquetry that could be inserted into a project. I was not yet working with wood, but wanted to replace the caned seat of an antique rocker, and bought all the supplies--cane, spline, and good instructions--from them.

I was distressed to learn that they had relocated some years ago to Ft. Lauderdale, but was fortunate to be able to visit their store last summer. What a treat! I fell in love with a piece of light blue birds eye maple veneer, but resisted the temptation, and settled for some dyed red and black veneer instead. Since they sell their stock by the piece, you can buy just what you need, and they are very responsive to special requests.

Take a look at their offerings--you never know when you'll need something really unique.

Friday, June 10, 2011

Currently in a dry spell

My latest experiment fizzled--just wasn't worth the effort, and I'm trying to muster up the energy to get going on a new lamination. What with the deck needing a new railing, and other time-consuming stuff like that, I'm just not working at the same pace. And given my space limitations, I'm trying to move forward with each new piece and make it special, and sometimes "inspiration" is slow in coming.

On the positive side, the edits for the new book have finally begun, and I saw a copy of the proposed cover today. It looks really nice, and as soon as I'm cleared to "go public" I'll post it here first. It's interesting that the photography and cover precede the text, so they can get going on the promotion for the book.

Thanks for your patience--I will definitely get going again soon.

Friday, June 3, 2011

A new woodworking site

I was recently interviewed about the bowl book, for a new woodworking site, Ravinheart Renditions. The site's just been launched, but should develop into something really nice. Check it out if you get a chance.

Thursday, June 2, 2011

Sanding sleeve solution--partly successful


When sanding anything with edges, the openings in the sanding sleeves for the round inflatable sander tend to catch and tear. I was able to fix this problem, using blue tape, with the coarsest sleeve, which is closed when new, but the fix did not work with the others. So, I limped along, trying to limit the damages to one set of sleeves. I like the bowl, but it certainly presented a challenge.

Wednesday, May 25, 2011

Simple dust collection "system"


I bought the keyless chuck for the SandFlee so I could use it for sanding. To control dust for the inflatable drum, I just wedged the end of the shop vac hose close to the drum. Worked great!

Wednesday, May 18, 2011

Not only for gelatin molds

I came across an interesting item in an old woodworking magazine, in an article on glues. It seems that hide glue, which is seldom used anymore, is made from gelatin. In a pinch, a quick version can be made right in the kitchen, using the powdered gelatin that's usually sold in little packets. Even though most homes these days are more likely to have glue on hand than powdered gelatin, I had to give it a try.

The proportions are 2-1/2 parts cold water to 1 part gelatin. Sprinkle the gelatin over the water to soften it. When it has softened, it will look mushy. Heat the mixture gently--I used the microwave--taking care not to let it boil. It will become clear. At that point, apply it to the wood. The article said that the open time is only 60 seconds, but I think it's a little longer than that. Once I glued the wood together and let it set up, I was completely amazed at how strong it was. Of course this glue does not stand up well to moisture, but for a quick and easy non-toxic glue it is quite amazing.

It also might be a fun project for kids, although who knows what they will think of to glue together!

Tuesday, May 10, 2011

Completed drill press fence


Here is the completed fence for my drill press. It's really simple, consisting of 2 bolts that fit into the track, and 2 wing nuts. It lets you position the wood properly so that multiple holes can be drilled at the same distance from the edge. It also provides a firm support for clamping pieces of wood that might not otherwise stay in place. For something so quick and easy, it is really a big help, not to mention a major safety improvement.

Tuesday, May 3, 2011

Drill press safety


The more I use the drill press, the more I respect it as a serious tool that is incredibly useful, but also dangerous if the piece being drilled is not held securely. The photo shows a quickly assembled fence I rigged up to stabilize some wood I had to drill. It made such a difference that it's going to be replaced with a more permanent one. The permanent fence, being narrower, will also allow easy clamping of smaller pieces of wood, important for saving both wood and fingers. I'll post pictures of it, once it's been finalized.

Wednesday, April 27, 2011

Another carved bowl


Here's another innovative use of the stacked ring technique, designed by Ron. As the last few posts have shown, bowls made with stacked rings can be varied by the materials used, or by the techniques applied to the basic project.

Monday, April 25, 2011

Larry and DW make bowls from Corian


Two members of the scroll saw forum have started making bowls from Corian. The white round bowl was made by Larry, and the lobed muted-tone bowl was made by DW. The only substantial change from making wooden bowls was the substitution of CA glue for the wood glue usually used.

I'm pleased to share these innovations with you, and will continue to post pictures of work that reflects new applications of the basic approach. Thanks, Larry and DW, for sharing your work.

Wednesday, April 20, 2011

A really nice project from "Tucson Ron"


I just received the first response to my invitation to send photos of your projects, a picture of a very lovely and creative vase made by a scroller/woodcarver from Tucson. I thought that you'd enjoy seeing it, and perhaps be encouraged to share your own work. Here are Ron's comments about his work:

I have just completed a special project that I would like to share with your readers. The wood is African Walnut and the carved section is Bass Wood. I laminated 1-1/2 inches of Basswood to both sides of a 4" wide length of the African Walnut. I made 4 blanks that were each 3/4" thick. 2 were cut for the center section which left the inside areas for the neck and top. 1 was cut for the 3 ring bottom section. 1 was cut for the 4 ring top section. I used your Oval Bowl pattern and set the table at 28 degrees left side down. The ring widths were 3/8 inch each. The finish is semi-gloss Deft Clear Wood Finish.

One of my other hobbies is woodcarving. I have carved many spoons and also like
relief carvings. I carve with a group call the "Western Whittlers" here in Tucson. I have shared several of my bowls with the carvers and two of them have been inspired to also do some bowls.

I have taught 4 individuals one on one and they have all produce a very nice first bowl. Two men that had never before operated a scroll saw and two women that also had never operated a scroll saw but were very accomplished sewers.

After having made about 25 bowls is seems that I have come to favor the rectangular patterns with only 2 rings. I call them dresser trays. They work very nice for holding keys, wallets, and cell phones on the dresser at night.

Sunday, April 17, 2011

Wish I had room for one of these


Despite our best efforts at maximizing space, we simply can't find room for a drum sander in our garage, even one slightly smaller than this one. It's the one tool for which I still use the community woodshop, and hope that no one has just tried to sand off paint, or used resinous wood and ruined the sandpaper. I use the drum sander primarily to level glued up blanks made from various types of colorful wood--it's the best way I've found so far to get a smooth blank that is evenly thick.

However, I have discovered that even though the blank appears flat, it usually needs further work, and that's where I use the SandFlee. The flatter the blank, especially for bowls, the easier it is to glue up the rings without spaces. I also use the SandFlee as a jointer to get my strips ready to glue up. Next step is to get a flex shaft extension for the SandFlee so I can sand places that I can't reach using the drill press. And that will be my Mother's Day present. Not as pretty as flowers, but a lot more useful.

Sunday, April 10, 2011

Tile for Charity Quilt for Japan


Members of my scroll saw forum were asked to volunteer to create a 4" x 4" x 1/2" wood tile that would be joined to others at the corners to form a quilt. This quilt is to be auctioned, and the proceeds will be donated to help the recovery efforts in Japan.

I decided to do something different from my usual work, and cut out a fretwork pattern in 1/4" thick circle of bloodwood. This was glued to two pieces of maple, one solid and one with a circular opening cut out for the bloodwood. I filled in the spaces with Inlace, then sanded and lacquered the piece. Although it still takes me several tries until all the spaces are completely filled, I think it was worth the effort.

Inlace is not inexpensive, but it goes a long way, and the effect is really dramatic. I'm looking forward to seeing what the quilt looks like once it's completed, with every square different.

Sunday, April 3, 2011

Keeping in touch

Just a reminder that if you have any questions about making bowls, please feel free to email me, with or without pictures, and I'll do my best to help.

And, if you're especially proud of a project, send pictures and I'll be happy to post them here (with your name or anonymously) so others can admire your work.

And now that the weather's warming up, I should be able to make some new videos on hints and techniques that I think you'll find helpful.

Sunday, March 27, 2011

The new swag bowl


As promised, here are pictures of the new swag bowl. The matches are not completely perfect, but they are a lot better than I've been able to do in the past. I used the technique demonstrated in my swag video, and find that it consistently works well.

The one addition to the technique that I'd suggest is that if it's hard to see the ends of the swags clearly for gluing up the rings, try sanding one of the rings just a bit to get a better look at what you have. If the rings have been cut properly, there will be enough extra wood to allow you to do that without jeopardizing the glue-up. And just to play it safe, consider gluing up just one ring at a time.


Tuesday, March 22, 2011

Closing in on the gaps

I discovered that when a board comes off the drum sander, it may look flat without really being completely flat. This may be the heart of the problem I've been having gluing up some of my bowls.

I discovered this when I ran a freshly sanded board over the SandFlee, and noticed that the sound it made wasn't the same throughout the length of the board. When I put the board on a completely level surface, I could get a very small rocking, about 1/64" inch, barely noticeable. I gave the board a number of passes through the SandFlee, and when it sounded flat, I checked it again, and there was a tremendous improvement.

I've finished gluing up and sanding the new bowl, and had very little problem getting the rings to lie completely flat against each other. In addition, the wood I had glued together to get the pattern I wanted was so well sanded that I could not even feel where the strips were located. I guess when you're working with such close tolerances, these small differences matter.

I'll post a picture of the bowl that I made with that blank as soon as it's finished, probably by the end of the week. It was an ambitious project, using laminated swags that spanned three rings and the base. Came out quite well, and the more I understand all these nuances, the better equipped I am to help others make better bowls.

Sunday, March 20, 2011

A Woodworker and Teacher

I was pleased to locate the reviewer of my bowl book on Amazon, who described how he used the book to teach retired folks to make bowls with the scroll saw. His name is Bob Taylor, and he is a retired carpenter, whose interest in doing trim work helped him develop the patience needed for scroll saw work.

During his winters in the Rio Grande Valley, he runs a weekly bowl class, charging only for the wood. I was impressed with his sensitivity to people’s feelings, and to their desire not to look foolish. Bob even uses “mistakes” in his own work as teaching opportunities. He distinguishes between those students with “passion in their heart”, who have the patience to do the best job they can, and those who just want to find shortcuts.

I’m pleased that my book was clear enough to be helpful to people like Bob, who reflect the dedication, sensitivity, and decency that I find in so many people in the scrolling community.

Wednesday, March 16, 2011

Jury still out on the SandFlee, and a new sanding tip

I finally have the SandFlee operating properly, although it took a 1/16" shim under one of the hinges to get the table level by the drum. I've installed the fence, which was an easy job. I haven't yet used it as a jointer, which is one reason why I bought it, but a preliminary test on a ragged edge looked promising. I need to plan out an interesting glue-up to give it a "field test".

However, I have been disappointed using it to flatten rings. I assumed that passing it over the roller would automatically remove any irregularities. What I seem to be finding instead is that when a ring is cut at an angle, forces may be released that prevent the ring from lying completely flat. This doesn't always happen, but has happened frequently enough to be an issue to contend with. When this happens, just sanding the gluing surface evenly, whether with the SandFlee or sandpaper glued to a flat tile, does not change things. The spaces are generally small, 1/32" or less.

What does work is selective sanding with the sandpaper glued to a tile. I look carefully at where there are spaces. You can use a flashlight or bulb, or strip of paper, to confirm. I then sand the surrounding areas that are too high by exerting unequal pressure on those spots, or if it's a corner, by just sanding that corner slightly. Then I check, and repeat the process as often as needed. The payoff is that you will not get a visible glueline between the rings. Sometimes there is enough flex in the ring for it to flatten out with pressure from the bowl press during glue-up, so it often becomes a judgment call.

The situation to avoid is a space that will not close when you exert pressure. That will result in a product that you won't be proud of. Take a break when you've "had it", then come back later. You'll be happier that you did!

Friday, March 11, 2011

An interesting and gratifying review on Amazon

I regularly check Amazon reviews to learn about reactions to my book. Two days ago, I found a new review, describing how my book was used to teach bowl-making to retired folks, some with no prior woodworking experience. I wanted to contact the reviewer to thank him or her, and to find out more about the classes, but Amazon does not release the identity of reviewers. However, it was permissible to paste the review into my blog.

I was intrigued because I, too, have found that complete novices can make bowls successfully. Also, because of my long-standing involvement with elder issues, the idea of seniors (like me) successfully embarking on a new hobby makes me smile.

So, here's the review. If you have written it, or know who has, please contact me so I can give thanks for a most interesting post.

Making Bowls started as idea not to waste wood. I'm a scroller for 4 years and after making several of these bowls, I was asked if I would teach a class on making bowls. Started with 12 retired folks, of which 2 were ladies with no experience with wood working tools.But they knew how to run a sewing machine and that put the men a a slight disadvantage.Pictures and instructions were understood by the class once they knew they had to follow the instructions.Extra time was spent on reading and understanding the making of the first bowl, which made making the rest in the book fall right into place. One of the ladies went home to her home state and ended up teaching her wood shop of retired woodworkers how to make wooden Bowls.Every one in last years class is back and advancing to the more interesting and challenging bowls.

Thursday, March 3, 2011

Search Feature Added

If you look on top of the right hand column, you'll see that I've added a search box. Just type in the subject you're interested in, such as "swags", and you'll see a list of posts on that topic. Should make accessing information a whole lot easier!

Tuesday, March 1, 2011

Good tools, good service

When several vendors sell the same product, at about the same price, customer service is often the determining factor for where to spend your money. I recently had some trouble with my inflatable round sander, the workhorse tool for making bowls, and could not have been more satisfied with King Arthur's response to my problem. I especially like when the phone is answered by a real person, and I can speak with someone who is familiar with the merchandise.

I've also been told that the customer service at Klingspor's Woodworking is very responsive to problems with their products. They've even replaced tools that failed through no fault of theirs, which is really nice of them. They are my go-to place for the hook & loop sanding pads.

The jury is still out on my new small Sand Flee. I'm having some set-up problems, but that may be due to my inexperience with a new tool. I'll let you know how I make out, especially if I need to contact their customer service.

Let me know if you've had any experiences, particularly good or bad, with any of the vendors I've recommended. If I make the recommendation, I do feel some responsibility for the outcome.


Wednesday, February 23, 2011

Scroll a Bowl with Woodworker's Journal

I'm pleased to report that an article I wrote for Woodworker's Journal, which appears in the April, 2011 issue, received a nice mention on their website. It can be accessed through this link. If you receive WWJ and decide to try the project, please let me know any questions you have or problems you run into.

It's always gratifying when the versatility of the scroll saw receives the recognition it deserves.

Tuesday, February 22, 2011

A useful program for making patterns

I've usually used very low-tech methods for making my patterns--ruler, compass, cookie cutters, graph paper, etc. While that usually is sufficient, it's not the easiest way to make a pattern for a bowl or stacked ring box.

I've recently started using a program called PolyDraw, created by Dave von Ess, available on the scrollmania.com website, which lets you create rings of various shapes and widths pretty easily. There's a tutorial to walk you through creating basic shapes--round, oval, rounded square, ripple--and once you've gotten the hang of it, you can play with various configurations. Patterns can be saved either as files that load right into the program, or as pdf's once you've drawn them.

I used the program for the outline of the 7-lobed box, and was pleased with how much easier it was than trying to draw a shape like this freehand. Dave is very helpful if you run into problems, and there's an email provided for this purpose.

Friday, February 18, 2011

Success story


The project is finally finished, despite the slight warp in the wood. Once the rings had been glued up, I used the inflatable round sander to get the indentations smooth, working through the grits from coarse to fine. Then I used the hook and loop pad sander to smooth the indentations and the lobes. I used the round sander to accentuate the lobes at the bottom, where there's plenty of wood to play with.

I wanted to accentuate the lobes at the top, but needed to keep a flat area for the lid. To prevent mishaps at this late stage, I completed the sanding, but left an extra large flat surface at the top. Then, I made the lid and put it into place. I traced the outside of the lid with a pencil to give me a guide line that would show me where to stop the shaping. I shaped it as before, using both the round inflatable and the hook and loop sanders. When I was satisfied with the shape, I gave it a sealer coat of shellac, then rubbed it down and gave it several coats of spray lacquer.

A lot of work, but you can't turn this one on the lathe!


Thursday, February 10, 2011

Gluing-up Tip

I was working on a new project today, with three sets of rings. After I cut the rings, I discovered that each blank had a slight warp in it. I tried out a new approach to saving the wood, and it seems to be working.

First, I selectively sanded parts of each ring to get it to lie as flat as possible, rubbing it against sandpaper attached to a flat surface. Then, instead of gluing up several rings at once, I glued up only two to start, to take advantage of the pressure from the bowl press. I then added one ring at a time, correcting any warping by sanding the ring and the glued-up unit.

I'm not finished yet, but it looks a lot better than I thought it would. My last project ended up as "designer firewood", and I really didn't want it to happen again. I'll post a picture when I'm through, regardless of how it comes out.

Monday, January 31, 2011

Back to woodworking


Even though my garage is still too cold to use for long, I have the well-heated community shop, which will do in a pinch. I made up a batch of mini baskets, using adaptations of larger patterns, just to have some fun. They were more time-consuming that they look, but were a nice break from regular stuff. The coin is a quarter. I don't know if I can make them nickel-sized without using the Hegner, but it might be fun to try.

Friday, January 28, 2011

The kitchen is warmer than the garage

Since it's been too cold to work in the garage, I've been staying warm by baking up a storm. To keep from forgetting how to make and post videos, I decided to shoot a video series on making a cookie that is no longer available. Made by Sunshine, no longer in business, they were called "Golden Fruit Biscuits" or something like that. Hope you enjoy watching, and baking.


Monday, January 24, 2011

Quick Tip, but you have to be careful

If one of your rings looks really rough--lots of burn, bad blade or drill marks--give it a preliminary sanding before you glue it to the other rings. You have maximum access at this stage, but need to be careful not to take off too much wood, especially from the upper and lower gluing surfaces. And if you use a spindle or belt sander to do the clean-up, be extra careful since they sand so aggressively.

Sunday, January 16, 2011

Those tricky lower edges, revisited with a square shape


One of the most difficult spots to sand is the inside bottom edge of the lowest ring, since once the base is glued on, there's no way to make corrections.

I've posted information on this topic before, but in case you missed it, here's a picture that shows sanding a square, which is even more demanding than a circle. It's sanded the same way as the circle, but you have to be careful not to sand in curves on the straight sides. If you're making your own patterns, be sure to keep the curves at the corners wide enough to accommodate the sander.

Saturday, January 8, 2011

Cutting precise angles

While I'm waiting for the weather to warm up a bit so I can get back into the garage without sending my pension check directly to the utilities company, I thought I'd use the time to post some hints that may have slipped through the cracks (in a manner of speaking).

Whether you're making a straight or angled cut, the first step is always to make sure that your saw table and blade are at right angles to each other. I like to use a small engineer's square, and hold it right next to the blade to see if it's parallel. If it's not "spot on", I loosen the knob that sets the angle, and tap the table gently until it's right. You'd be surprised at the precision of this non-technical approach.

Some people make a shallow cut into piece of wood, then see if the back of the blade will fit precisely into the slot. If you do this, use a blade with a very small kerf or you can "fudge" your results. However you determine square, tighten the adjusting knob so it can't slip, and move the gauge, if necessary, so it is set to zero. Sometimes this is done by loosening a screw, other times by moving the label. Now you can use the gauge with some confidence, although a quick check is never a bad idea.

Once you've set the table properly, you can use the saw's gauge, or a magnetic angle gauge, to set the cutting angle. And if you do angle cutting, always reset your table to zero when you've finished. Of course you'll notice large table tilts, but a tilt of 2 or 3 degrees may not be apparent if you're not expecting it, and can really mess up your straight cuts.