Welcome to my blog. Let what you see stimulate your imagination and inspire your own creations.

Tuesday, November 29, 2011

Fast and easy finishing method

Since my garage shop has no ventilation, it's not the place to apply the clear coat finishes I like to use on my projects. Fortunately, the activities building that's part of my condo development has an art room, with a fan that vents to the outside. The down side of this is that I have to use the room when no one else is around, close the door, put on the fan, and get to work.

So, for me, speed is important, and over the past few years, I've streamlined my approach. First, if glue spots may be an issue, it's prudent to apply mineral spirits to the project right after I think I've finished sanding it. This makes any glue spots clearly visible. If you use some chalk to mark them, you'll be able to find them again once the mineral spirits dry. I sand off all I find, using the finest grit that does the job. If they're stubborn and I need a coarse paper to remove all traces, I sand through the grits in that area so it will finish the same as the rest of the project.

Then, I cover the table with newspaper and place the pieces to be finished on small pieces of wood. I apply a thin coat of spray shellac. This seals the wood, and reveals any glue spots I may have missed. I rub down the finish, which tends to be a little rough at this stage, using either 320 grit sandpaper, 0000 steel wool, or a sanding mop at 320 grit.

I tack everything off well (damp paper towel works for me if I'm careful) and apply several coats of clear gloss spray lacquer. This dries very quickly, and between each coat, I check for sags or roughness, and rub them down with the 0000 steel wool. When I've coated the projects to my satisfaction, I give them an overnight dry, then a final rubdown with 0000 steel wool for a soft matte finish.

Since the building is climate controlled, humidity and temperature is not a factor, and I can often complete the entire job within 2 hours or so. Then, I clean up my materials, turn off the fan, and no one even knows I was there!

Monday, November 21, 2011

The long wait should soon be over


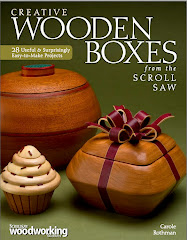
The new box book is not yet generally available, but I just got my advance copy. That convinced me beyond a doubt that it's really going to happen! The picture above is of one of the projects, a little ring box, made using little brass barrel hinges and containing a velvet-covered insert for a small ring. It took a while to figure out how to make a professional-looking insert that was inexpensive and easy, but I finally nailed it. This project is one of several small jewelry boxes that are quite professional looking, and should make great gifts or crafts fair items.

The new book is about 40 pages longer than the bowl book, although it contains the same number of projects. Since many of the projects were different from each other, a lot more photos were needed for clarity of instruction. I'm really excited about sharing my projects, and glad that the book is almost here.

Monday, November 14, 2011

Today's photoshoot

Wish I had pictures to show you from today's photoshoot with the photographer from Woodworker's Journal. I was really pleased to have a new box project accepted by them for publication, and they sent a pro to my shop for the process shots. The first time this happened, it was quite an adjustment, since I've been used to taking my own process shots for my books and articles.

Well, my shots are certainly functional, but these were elegant! We worked from 9AM to 6PM, at which time I was barely standing. When I get the proofs back, I'll make my selection, integrate them into the text, and wait while the WWJ editors turn the whole thing into an article.

It's really amazing to watch your garage workshop become a full-fledged photo studio, and I feel really fortunate to have this happen twice (so far). I'll let you know when the article comes out--it's a really nice project, and quite different from anything in the book.

Saturday, November 5, 2011

The inspiration for the box


Thought you might like to see the image that inspired the box. It took some work to make it into a pattern, but that's what Photoshop is for!