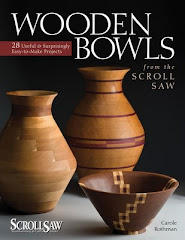
Welcome to my blog. Let what you see stimulate your imagination and inspire your own creations.

Sunday, November 22, 2009

Sanding Tips #2


To get a continuous effect with swags and straight lines, you need to anticipate where the rings will meet once the bowl is sanded smooth. This picture shows two rings about to be glued, and illustrates how you can follow the line of the swag from one ring to the next. If you do this at each point that must be matched, the insides will take care of themselves.

Saturday, November 21, 2009

My favorite sander


I demonstrated the use of this inflatable sanding ball at the LI Woodworkers show last weekend. It is absolutely invaluable for curved pieces. I'm trying to convince the owner of the company to come out with a smaller version, as well. The tool's not cheap, but I've sanded well over 100 bowls with it, and the rubber is still in good condition.

Tuesday, November 17, 2009

Pictures from the LI Woodworkers show


I spent an exciting weekend doing demos at the LI Woodworkers Show, meeting people, and looking at wonderful examples of fine woodworking. Here are some pictures we took--it was an event that was well-worth attending.

Friday, November 6, 2009

Long Island Woodworker's Show

I'll be doing demos on how to make wooden bowls using the scroll saw at the Long Island Woodworker's Show. The show is being held on Nov. 14th and 15th at Old Bethpage Restoration in Old Bethpage, LI. It should be well worth attending, and I'm looking forward to sharing my techniques with other woodworkers.

Thursday, November 5, 2009

Amazon Author Page

I've just created an author page on the Amazon website. On this page you can find out more about me, my interests, and view other books I've written. Please check it out when you get a chance. Thanks!

Monday, November 2, 2009

Sanding Tips #1

This is the first of a series of sanding tips that you may find helpful as you make your bowls.

Today's tip: to keep your 2" sanding discs in order, use a 3 x 5 card file and a set of dividers. Label each divider with the grit stored in that space, and you'll never have a problem figuring out which grit you're using.

Saturday, October 24, 2009

Updated Ribbons and Bows Box

In 2007, I entered a box with a bow on it in Scroll Saw Woodworking & Crafts' design contest. I decided to update the box using the stacked ring approach. Instead of adding a ribbon on top of the box, I glued in a laminated strip of purpleheart. The loopy bow and tails were adapted from the bow pattern from the earlier project, using 8 loops to compensate for the narrower size. I'm really pleased with the results, and intend to try out other "bowl boxes".

Tuesday, October 13, 2009

Old patterns, new bowls


Using only the patterns from my book, varied slightly or combined, I've come up with some interesting combinations. Since thin wood is expensive (re-sawing is not an option) I'm experimenting with using veneers for added interest. I bought a big box of assorted veneers relatively inexpensively, which should last a long time. I'm trying to create vessels that would be difficult to do on the lathe--another victory for the humble scroll saw!

Monday, October 5, 2009

Bowls that fly

Just a cautionary note. Yesterday, as I was sanding a new project at the drill press, an edge of the bowl caught on a light that's attached to the press and went flying. Fortunately, the edges were still thick enough not to be damaged, and I was not hit by the flying object, but it was a reminder that even relatively safe tools like the drill press can turn lethal. So, hold on tightly to your project, pay attention at all times, and use protective eyewear.

Friday, September 25, 2009

Another Useful Site to Visit

Steve Goode's blog is a wonderful source for free patterns, resources, and helpful information. Check it out--you won't be disappointed.