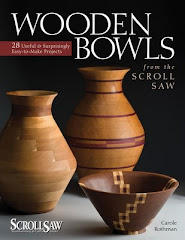
Thought you might like to see the results of the glue-up featured in the prior blog post. This basket-weave bowl required two different blanks, rings stacked alternately, to get the gradually sloping sides.
I gave it a wax finish, which I think worked well, and was practical since I only spray outdoors, and certainly can't do that in sub-freezing temperatures.
Saturday, January 31, 2015
Wednesday, January 21, 2015
Some tips for better gluing-ups
In working on a new bowl lamination, I realized that I now do some things automatically that are important in obtaining a good glue-up. Here's a video that contains some tips that you might find helpful.
Labels:
glue-ups,
laminations,
scrolled bowls
Wednesday, January 7, 2015
The Blooming Petal Bowl
Just in case you were wondering, here's the project whose leftovers are used for the bonus box. It's not "quick and easy", but if you take your time, you should be able to produce a bowl that will be the envy of your wood-turning friends!
Labels:
lathe,
petal bowl,
scroll saw,
wooden bowl
Saturday, January 3, 2015
The Bonus Box instructions
If you make the open petal bowl featured in the Spring, 2015 issue of SSWC, you might want to use the centers left over from cutting the middle and upper rings to make this cute little box. Since it is made almost completely from scrap, I call it a "bonus box".
The pattern and instructions are too long to post directly on the blog, but if you're interested, email me at scrollsawbowls@yahoo.com and I'll set you a set of instructions with process photos, and a pattern for the lid.
The pattern and instructions are too long to post directly on the blog, but if you're interested, email me at scrollsawbowls@yahoo.com and I'll set you a set of instructions with process photos, and a pattern for the lid.
Labels:
petal bowl,
wooden box
Friday, January 2, 2015
The Heart Cupcake Box
The last cupcake in this series features "candy" hearts. Here's the inspiration:
And here's the version as a wooden box:
The lid was cut from ¾” thick zebrawood, and the hearts cut from 1/8” yellowheart and purpleheart, and also from maple, veneered with pink and red dyed veneer. The sides of the veneered hearts were painted to match the tops. The piping was done with MUD, a compound that pipes from a pastry bag and dries hard like wood. For the tiny letters, I used a #0 piping tip.
Here are the patterns for the hearts. You will probably have to resize them to fit, or just draw your own.
Hope you've enjoyed these additions to the cupcake project featured in the Spring, 2015 issue of SSWC, and are inspired to create your own delicious variations!
Labels:
cupcakes,
dyed veneer,
hearts,
valentine cupcakes,
wooden cupcake box
Thursday, January 1, 2015
The Flower Cupcake Box
Next up is a cupcake decorated with a wooden flower. The inspiration for this design were these cupcakes:
The wooden version looks like this:
The wooden version looks like this:
To make the lid, I used 1/4” thick yellow heart and decorated it with petals cut individually with the grain from 3/16” thick padauk, shaped by sanding. You could also cut the petals as a segmentation, but you'd lose the grain effect. For the center, I drilled a hole ½” in diameter in the middle of the petals, and cut a matching plug, which was sanded and covered with fabric paint dots.
Here's the pattern for the flower:
Labels:
cupcake,
cupcake box,
fabric paint,
flower cupcakes,
padauk,
yellow heart
Subscribe to:
Posts (Atom)


